TIPS & TRICKS
Get the Most Out of Your Business Management Software
The team at Parallel Solutions has compiled these tips and tricks to help you get the most out of your business management software.
Acumatica: 2021 R2 New Feature Overview
Check out this overview of new features included in Acumatica 2021 R2.
Acumatica: Importing Transaction Details Without an Import Scenario
by Laura Jaffe
Acumatica provides tools that make it very easy to upload data from a variety of data sources. One common upload method is using Import Scenarios. Another method, and the subject of today’s blog, is the Load Records from File button which allows a user to interactively upload details records from a flat file (in either CSV or Microsoft Excel format.)
Tips to use Load Records from File on existing Acumatica screens
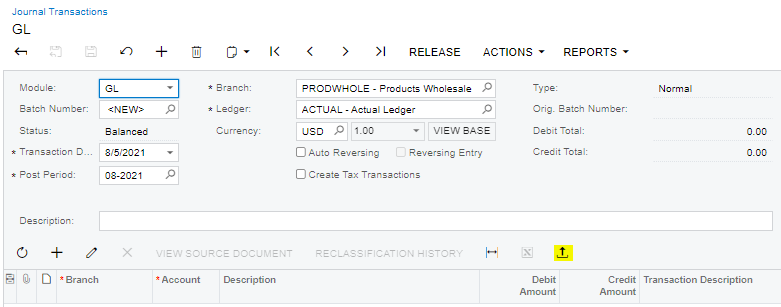
The Load Records from File option is generally used to upload details on a transaction screen. It is available anywhere you see the upload icon on the toolbar.

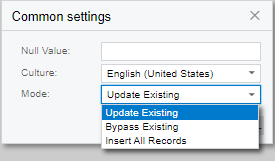
- Update Existing: Updates the rows that are already present in the table and adds new rows that are not present in the table.
- Bypass Existing: Imports only new rows that were not present in the table. The existing rows will not be updated.
- Insert All Records: Adds all rows from the file to the table. If you select this option, you may get duplicated rows because the system won’t check for duplicates.
Next Acumatica attempts to match the column headers from the source file with the properties from the Acumatica data grid. If the names match exactly, they will be auto matched. Otherwise, the user can create the appropriate mapping using the dropdowns.
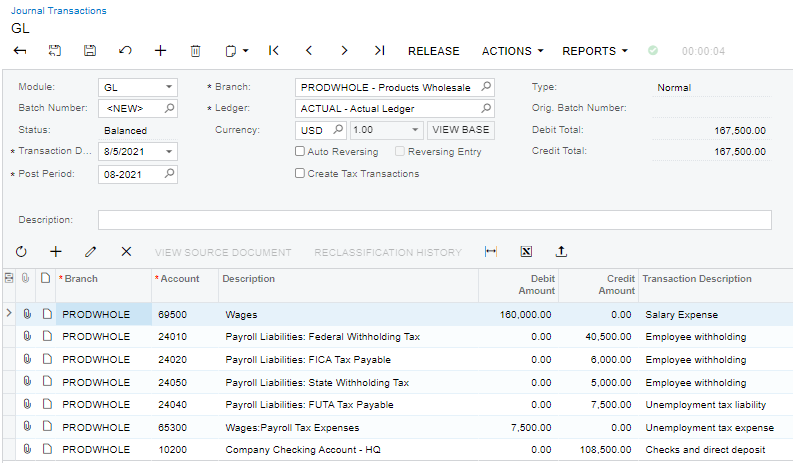
HINT: A convenient way to create an Excel template with the matching column headings is to start with an Excel export from the same data grid.
Click OK, and the data is uploaded to the screen. Be sure to save the transaction, same as you would if the data was keyed in manually.
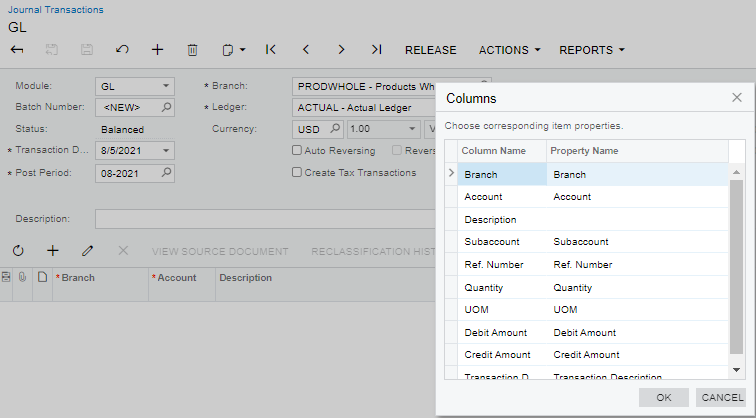

And these are just a few of the many use cases we have seen for this functionality
- GL transactions from an external payroll provider
- Sales order details based on a file provided by the customer
- Inventory starting balances or adjustments
- GL Account starting balances
- Labor transactions from an external time clock system
How to add Load Records From File on a custom screen
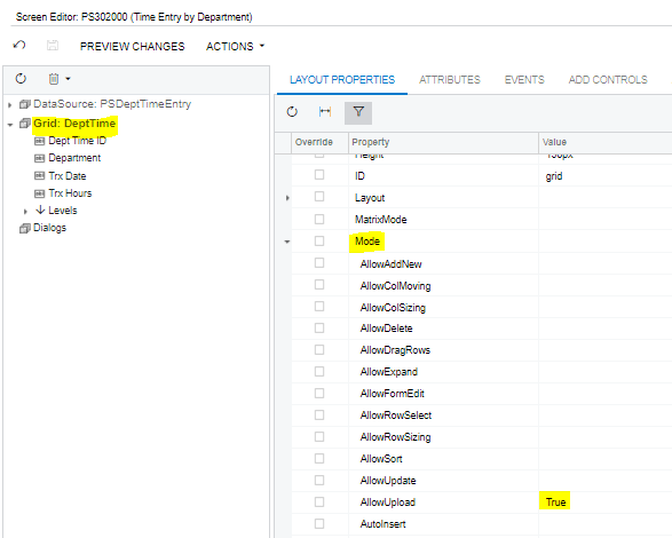
One benefit of the Acumatica xRP platform is organizations can extend the platform and leverage the very same framework used by the Acumatica product developers. To incorporate the Load Records from File widget on a custom screen there are two only two steps required in the Acumatica customization project:
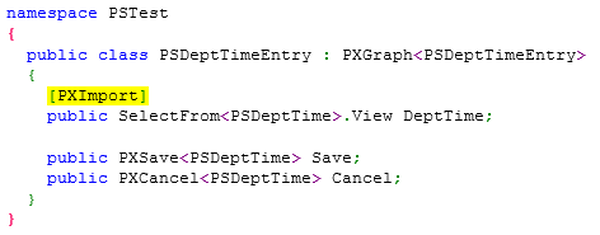
- Add the [PXImport] attribute on the data view. In this example we have a customer DAC named PSDeptTimeEntry, and we have decorated the DeptTime view with the [PXImport] attribute.

Exact Globe: General Ledger Budgets
By Michele Shanower
Note: Tested on Rev419
Exact Business Software allows users to create an unlimited number of budget scenarios based on various forecasts for long or short term periods. Using the Exact Globe Excel Add-In, it’s easy to create new scenarios and adjust existing ones.
Below are the steps on how to upload a Budget into Globe from an Excel Spreadsheet.
NOTE: We highlighted important tips in red in the procedure below.
- Open Excel and create a new worksheet.
- On the Add-Ins tab, click Exact Globe Next > Reports (or the magic wand icon)
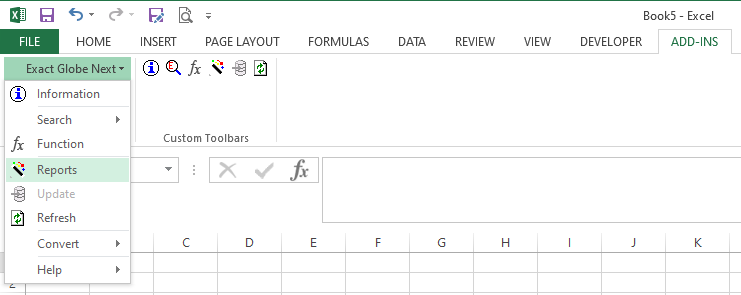
- On the Open Company screen, select a company and click OK.
- On the Reports screen, select Budget in the Generate field.
- Select Scenario in the Budget Scenario field. To use a budget scenario, you must have one defined in Globe.
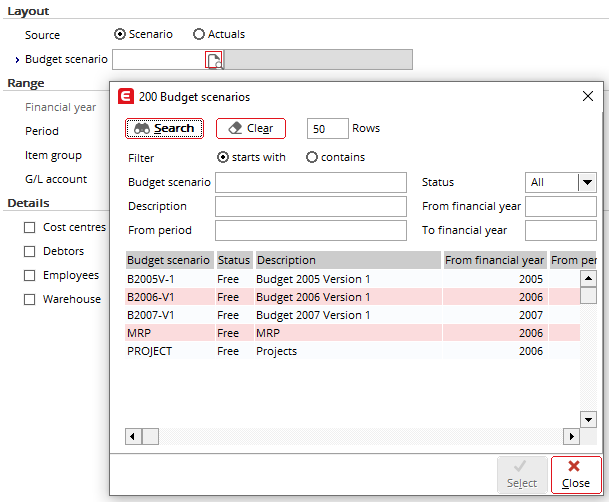
- If you want to create a new budget based on a previous year, you must enter BOTH years (this year and last) for Financial Year
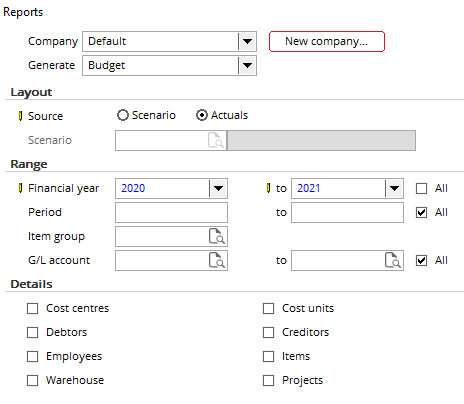
- Enter the criteria for the part of the budget you want to work on right now. Please be aware, if the spreadsheet is closed it will lose the update link back to Globe so you may want to work on different sections at a time.
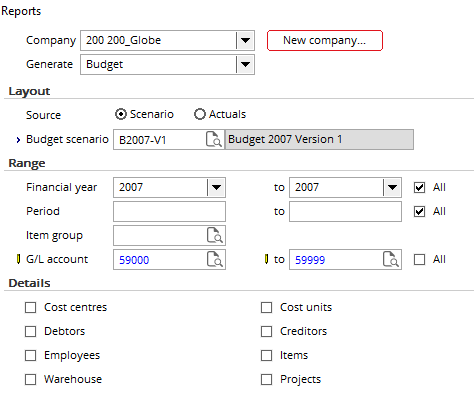
- Click OK to display the report in Microsoft Excel.
- Enter the budget details
WARNING: If you close the spreadsheet, it will lose the update link back to Globe. It is important that you upload all the information at one time without saving the spreadsheet.
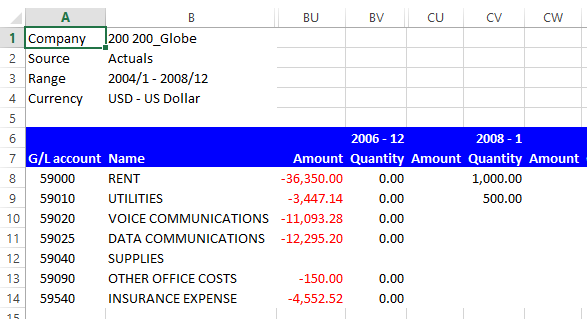
- To write the budget back to Globe, click Exact Globe Next > Update on the Add-ins tab.
- Select the Scenario that you want to update or if creating a new budget scenario, enter the information on the screen and it will create the new budget scenario for you.
NOTE: The year you update must be included in the range of years used to create the Excel Budget in step 6 above or you will get a message that states it cannot update the data.
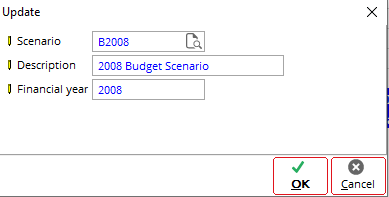
- To View or CHANGE repeat above.
Note: Each time you click the update button it will OVERWRITE the budget scenario in Globe with the data from the Excel Spreadsheet.
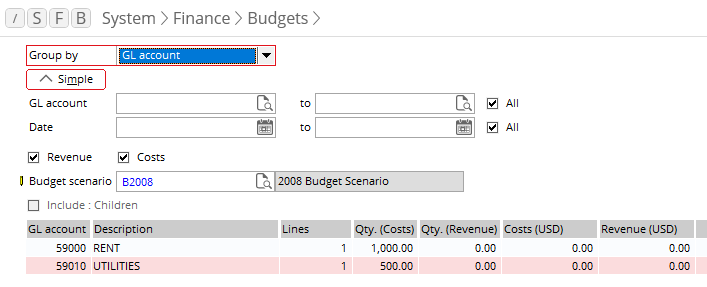
- You can find the review budget scenarios in Exact Globe under System > Finance > Budgets.
Want to Get Even More Out of Your Business Management System?
Contact the experts at Parallel Solutions and let us show you how to get the most out of your Acumatica Cloud ERP and Exact Software investment.


