
The generic Inquiry side panel, which was introduced in 2018R2, is a great example of an Acumatica “no code” platform feature. Side panels are used to define a split screen adjacent to a result grid. The side panel can be configured to display screens, reports, dashboards, and even other related generic inquiries. Side panels make it convenient for users to work down a list of results without losing context.
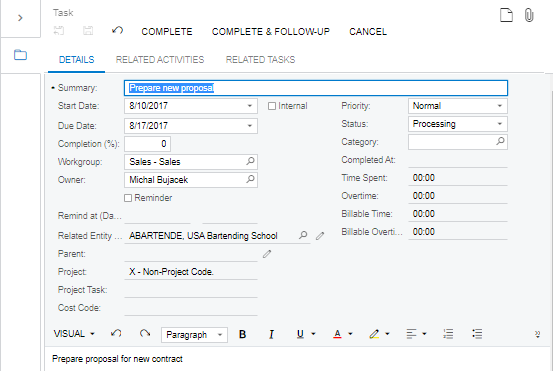
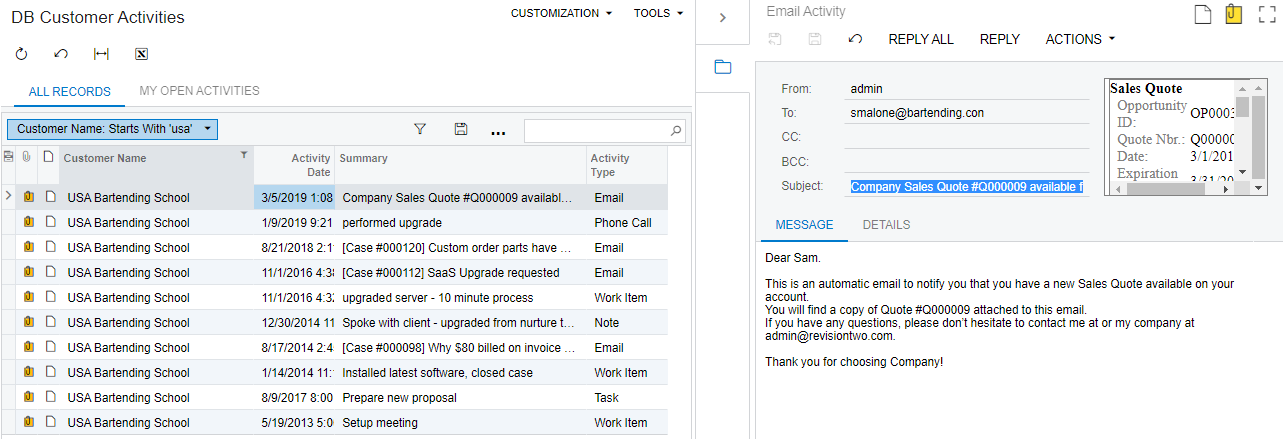
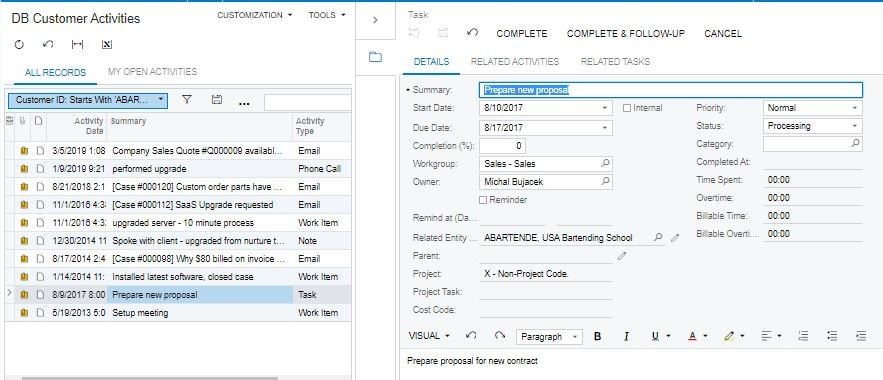
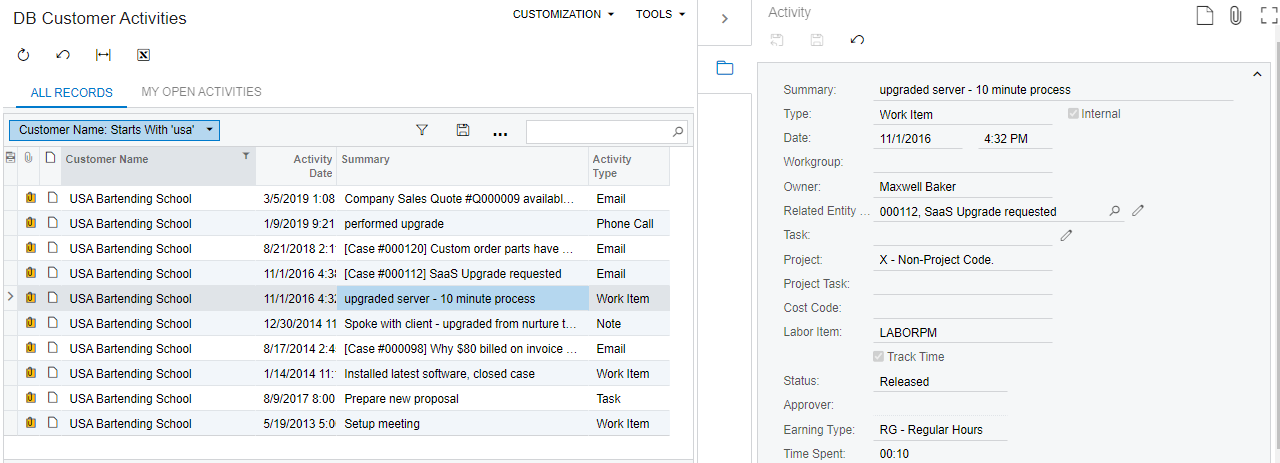
That being said, one of the pitfalls that I’ve sometimes run into with side panels is the situation where the detail screen is not applicable for all of the records on the list. A good example is a list of Customer Activities such as the one shown below. It’s easy enough to add a side panel to display screen CR306015 (Email Activity) which pertains to the first record on the list shown below.
However, if users select the next activity on this list, which is a Phone Call, they will see an error similar to this one:
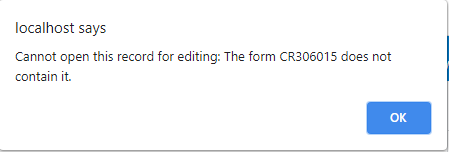
This is because the generic inquiry in this example is based on the DAC (data access class) CRActivity, which is used in Acumatica to store several different classes of activities including emails, phone calls, and tasks. Each of these activity classes has a different corresponding detail screen. Emails are displayed on screen CR306015, tasks on screen CR306020, and general activities on screen CR306010. When we add a navigation link such as the side panel, the user will receive a popup error like the one shown above if they navigate to a screen that doesn’t apply for the highlighted record. Needless to say, this doesn’t make for a great user experience!
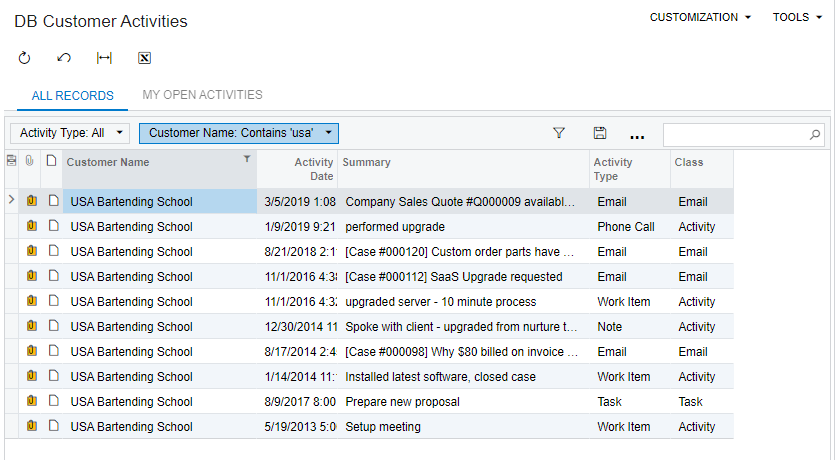
Here I’ve added the CRActivity.ClassID field to the result grid in order to explore the different classes.
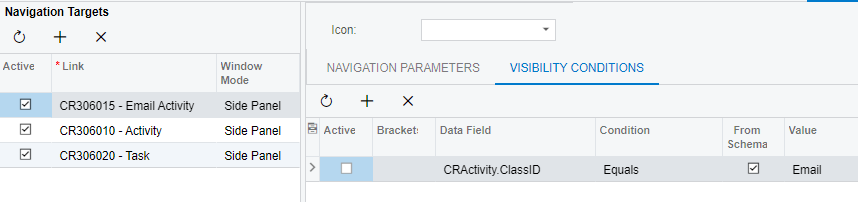
Using the new Visibility Conditions tab, we now have the ability to specify the conditions under which a particular side panel should appear. In the screenshot below you can see three navigation targets, and for each navigation target we have specified that it should only be visible when the ClassID meets the criteria for that screen. Using the “From Schema” checkbox makes it easy to specify a condition for the ClassID.
Now when a user expands the side panel will automatically view and be able to act upon the corresponding detail record, not matter what the activity class.
Voila, no more error messages! I can think of many other use cases for conditional visibility, such as to view various types of business accounts, or to manage the kit specification from a mixed list of stock items.
For more Acumatica Tips and Tricks be sure to visit our blog often.